I have blogged about a couple mini banners I have created but never one of the full size banners or the recent custom banner I completed... So here comes another series of posts featuring banners and ribbon...I love ribbon and will be using these posts as entries to the Heart 2 Heart Challenges this week ~ Ribbon!!! Perfect for several of my projects...
Here it goes...
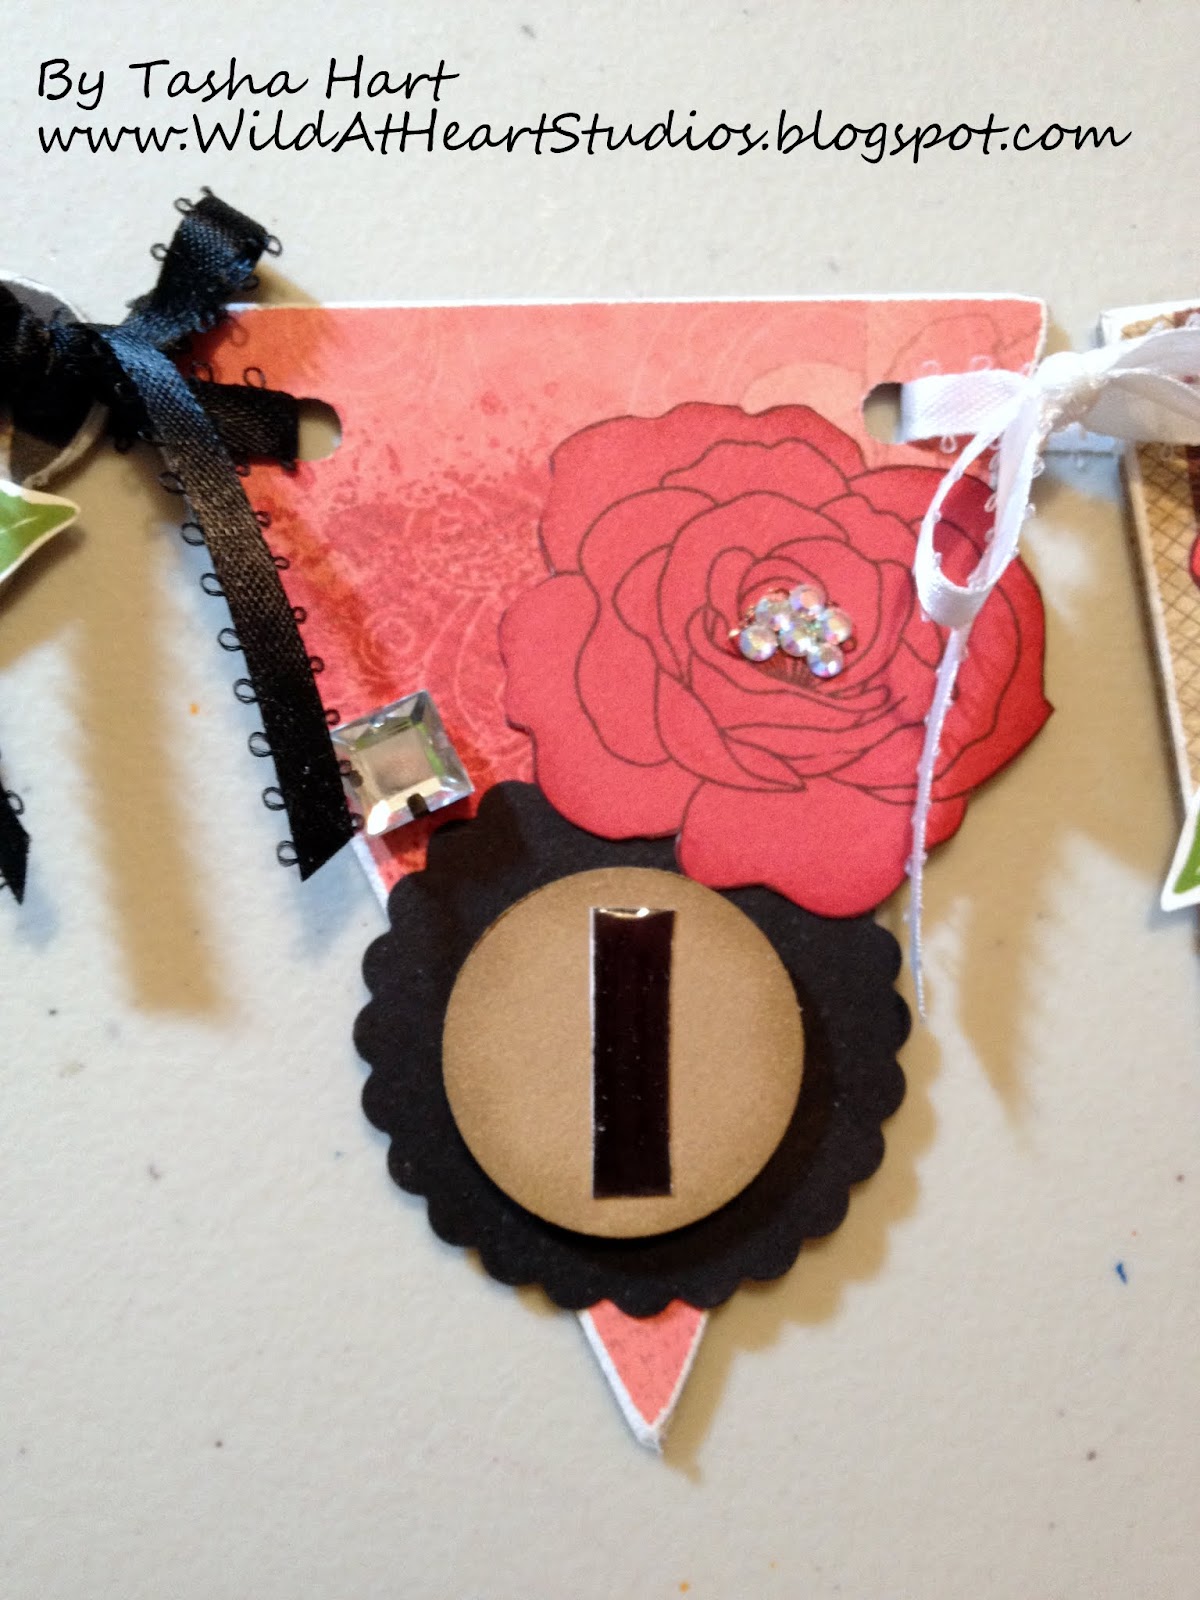
I recently had a great opportunity to create a mini banner for a little girl...My first instinct was "Dotty Paper!!!" but after a few moments and some questions asked I decided to go "Wild Rock Princess" So Roxie it was!
I used three types of pendents and three patterns of paper from the paper packet. This just happens to be one of my favorite paper packs! I knew my customer liked the Trinity Alphabet stamp set so I knew I would be using them for the name...Presley...sounds so Rocker too!
I started by picking my patterns of paper and began tracing and cutting (once again forgetting to use my Cricut and the Art Philosophy Cartridge...) Once all the pieces were cut, I chose to stamp roses from the Card Word Puzzle stamp set in two different card stock shades ~ Tulip and Smoothie. I decided to alternate them one each pendent. My first Idea was to place the name on each rose...not very impacting!!!
I stamped each letter in black and chose to place them on a Desert Sand circle punched out with the 1 1/4" circle punch. I popped it up and layered it onto a Black scalloped circle that I punched with the 2" Scallop Circle punch. I then liquid glassed each letter - amazing effect!
Now each rose needed bling so I chose to use some Crystazzi jewels in two styles and sizes. Some irridescent and some clear... all bling is perfect to me and the more the better.
I LOVE bling so I knew I had to use some of my Teresa Colling Blingage jewels. Beautiful black jewels that hang so perfectly from a few of the pendents...Talk about Princess Glam...
As I started to assemble the pieces I decided to add a glossy black chipboard key to the banner. I wanted it to be a symbol from this mom to her daughter ~ a key to her heart ~ what every mom gives to their child.
Like I said I LOVE bling! So I decided to up the glam factor and added some Jolee self-adhesive Bling. I opted for these over the Bling Buttons because I wanted the square and rectangle shapes and less round or curved shapes to this project.
Tied with black and white satin bows - this banner is sure to make any Wild Rock Princess smile... I know mine was smiling and asking for her own - with more bling of course!
Hope you enjoyed this project and will come check out all the other great projects featured on Heart 2 Heart Challenges. Maybe this is the week you come and play too!
Let's Live Inspired!
Showing posts with label Idea Book. Show all posts
Monday, June 18, 2012
Friday, June 8, 2012
{Stampaganza ~ Card Word Puzzle ~ Part Deux}
Have you ever noticed that at times you spend more time creating cards that you don't really require and when the time comes that you do need a card for some special occasion you realize that you don't have one?
Well I find that I do this all the time...short on cards for weddings, graduations, or anniversaries...I decided that everyone needs cards for all occasions so while creating cards for the card club I added an anniversary card to the list. I love the one in the current Idea Book with the Card Word Puzzle Stamp Set (C1494) It is a 8x3.5 card which is also another thing I don't make often...for instance maybe once...This card uses the Wishes: All Stacked Up pattern.
Well I set out creating and fell in love with so many aspects of this card. I loved the simplicity without the card coming across as dull.
I made the card on a cream base and added Dutch Blue Cardstock and using the Sanding Block in the Sanding Kit (Z1294) I sanded in a cross-thatch pattern to add some distressed marks to the white-cored cardstock.
I added some spritzed White Daisy cardstock squares (I used Walnut Ink in Java) and stamped my sentiment and two Desert Sand leaves onto the squares. I stamped three flowers onto the cream squares and using the Close To My Heart Watercolor Pencils I colored in each flower and blended. Cut them out and left a slight border around each one.
Once all the pieces were ready I mounted the sentiment onto an Outdoor Denim Square and placed each piece onto the card front. I added some Bitty Pearls which I colored with a Copic marker and two Mocha Opaque Pearls onto the centers of the flowers.
Onto the inside of the card I stamped a flower and colored with the watercolors and voila...New Card!
I truly enjoyed creating this lovely card and hope one day I will part with this card and make a special couple smile! Join me again for another card and another stamp set...
Let's Live Inspired!
Well I find that I do this all the time...short on cards for weddings, graduations, or anniversaries...I decided that everyone needs cards for all occasions so while creating cards for the card club I added an anniversary card to the list. I love the one in the current Idea Book with the Card Word Puzzle Stamp Set (C1494) It is a 8x3.5 card which is also another thing I don't make often...for instance maybe once...This card uses the Wishes: All Stacked Up pattern.
Well I set out creating and fell in love with so many aspects of this card. I loved the simplicity without the card coming across as dull.
I made the card on a cream base and added Dutch Blue Cardstock and using the Sanding Block in the Sanding Kit (Z1294) I sanded in a cross-thatch pattern to add some distressed marks to the white-cored cardstock.
I added some spritzed White Daisy cardstock squares (I used Walnut Ink in Java) and stamped my sentiment and two Desert Sand leaves onto the squares. I stamped three flowers onto the cream squares and using the Close To My Heart Watercolor Pencils I colored in each flower and blended. Cut them out and left a slight border around each one.
Once all the pieces were ready I mounted the sentiment onto an Outdoor Denim Square and placed each piece onto the card front. I added some Bitty Pearls which I colored with a Copic marker and two Mocha Opaque Pearls onto the centers of the flowers.
Onto the inside of the card I stamped a flower and colored with the watercolors and voila...New Card!
I truly enjoyed creating this lovely card and hope one day I will part with this card and make a special couple smile! Join me again for another card and another stamp set...
Let's Live Inspired!
Thursday, June 7, 2012
{Stampaganza ~ Card Word Puzzle ~ Part 1}
Have you ever wanted to create a card and look around and realize you don't own the right stamp?
Well even though I am a consultant there are stamps that just don't speak to me or ones that I find I will probably never use...Then there are the stamps that I buy and never use or ones that I want and put off purchasing...We all do it, this month is the month that I am going to try to get a few of those stamps that I have been putting off...
Well I was promising the ladies of the recent card club 4 cards and I went to the current Idea Book for inspiration. I came across a picture of a 6x6 card that used a stamp that I really did not own. I had pondered buying it but thought it was not one that I would use much...
So on this day I had to really try to figure out what I was going to do to allow me to create this card still...Inspiration strikes at the most odd of times... I sat planning another card and see the answer starting back at me... use a different stamp and add a different technique.
Instead of using the Rosy Regards (B1369) I chose to use Card Word Puzzle (C1494)
I cut out the card base from Outdoor Denim Cardstock and added White Daisy with a pattern embossed into it. I added a piece of Pacifica Cardstock another White Daisy layer and a banner made of Pacifica.
I stamped a set of 3 roses in Black Ink and shaded them with Close To My Heart Watercolor Pencils (3503), blended them and brushed over them with Create-A-Shade Pearl Paint (Z1039) to give them a little shimmer. Once they were dry I began to cut them out. One being the whole flower, next one a layer was taken off and the third layer was cut with one more layer missing...using 3-D foam squares I popped each layer up giving this card some great dimension...
Once the rose was completely assembled, I took my Bronze Glitz Glitter Gel (Z1483) and added some to the center of the rose. I love the look that resulted...
I had to come up with a sentiment and didn't want to let this card be anything but Cheery...So I opted for 'Cheer Up!' from 4 My Friend (D1510) I stamped it in White Daisy Ink (Z2163)
How often do you see cards where the inside is dark or forgotten. I thought since this card has a dark base I added a white daisy cardstock base to the inside of the card and distressed the edges in Dutch Blue Ink and stamped a couple butterflies to the corners...
Hope you come back for another card added to this great series going on during the month of June!
Let's Live Inspired!
Well even though I am a consultant there are stamps that just don't speak to me or ones that I find I will probably never use...Then there are the stamps that I buy and never use or ones that I want and put off purchasing...We all do it, this month is the month that I am going to try to get a few of those stamps that I have been putting off...
Well I was promising the ladies of the recent card club 4 cards and I went to the current Idea Book for inspiration. I came across a picture of a 6x6 card that used a stamp that I really did not own. I had pondered buying it but thought it was not one that I would use much...
So on this day I had to really try to figure out what I was going to do to allow me to create this card still...Inspiration strikes at the most odd of times... I sat planning another card and see the answer starting back at me... use a different stamp and add a different technique.
Instead of using the Rosy Regards (B1369) I chose to use Card Word Puzzle (C1494)
I cut out the card base from Outdoor Denim Cardstock and added White Daisy with a pattern embossed into it. I added a piece of Pacifica Cardstock another White Daisy layer and a banner made of Pacifica.
I stamped a set of 3 roses in Black Ink and shaded them with Close To My Heart Watercolor Pencils (3503), blended them and brushed over them with Create-A-Shade Pearl Paint (Z1039) to give them a little shimmer. Once they were dry I began to cut them out. One being the whole flower, next one a layer was taken off and the third layer was cut with one more layer missing...using 3-D foam squares I popped each layer up giving this card some great dimension...
Once the rose was completely assembled, I took my Bronze Glitz Glitter Gel (Z1483) and added some to the center of the rose. I love the look that resulted...
I had to come up with a sentiment and didn't want to let this card be anything but Cheery...So I opted for 'Cheer Up!' from 4 My Friend (D1510) I stamped it in White Daisy Ink (Z2163)
How often do you see cards where the inside is dark or forgotten. I thought since this card has a dark base I added a white daisy cardstock base to the inside of the card and distressed the edges in Dutch Blue Ink and stamped a couple butterflies to the corners...
Hope you come back for another card added to this great series going on during the month of June!
Let's Live Inspired!
Wednesday, June 6, 2012
{Stampaganza ~ Just For You}
Well for my second installment of my Stampaganza series, I have decided to use the Just For You Stamp set (B1398) I have bought 4 of these stamp sets and finally had one that I didn't sell before I got the chance to play with it. Well I finally found time to use it before someone came looking for it...
I was looking for cards to use for the card club again and really wanted to create this card in the current Idea Book. So I took a stab at it... If you decide that you would like to try it too you can find the pattern for it in the Wishes How-to Book. The pattern is called Gallery. I went be just the look of the card and tried to create it myself...
Here's what I used:
B1398 ~ Just for You
Z7147B ~ Stella Paper Packet
Z1360 ~ Rhinestone Designer Brads
Z2114 ~ Cocoa Exclusive Ink
Z2155 ~ Topiary Exclusive Ink
Z2195 ~ Lagoon Exclusive Ink
Z2118 ~ Desert Sand Exclusive Ink
Z697 ~ Sponge
White Gel Pen
On to the card...
I started by cutting the flowered shape on the Cricut using the Art Philosophy Cartridge. This is just one of the many (over 700 shapes) that this useful cartridge cuts out... I then stamped the dotted lines in cocoa onto the shape and picked a pattern and stamped it first in Lagoon and then 'Rock & Rolled' the stamp into Topiary...stamp and repeat, stamp and repeat, stamp and repeat...x6....
I distressed the edges using Desert Sand and a sponge giving the edges a beautiful golden glow as well as the look of an aged piece of paper...leaving it looking stunning!
I used a white gel pen to draw on faux stitching which is a quick and easy way to add simple details without it taking hours of hand stitching. I added the faux stitching to tie in the cocoa stitched pattern on the flower cut out...
I used mt piercing tool and pierced a hole into the center of the cut out and placed a rhinestone brad. Added 3-D foam squares and pooped up the cut out for some added dimension.
Hope you enjoyed this card, there's more where that came from...stay tuned for more!
Let's Live Inspired!
I was looking for cards to use for the card club again and really wanted to create this card in the current Idea Book. So I took a stab at it... If you decide that you would like to try it too you can find the pattern for it in the Wishes How-to Book. The pattern is called Gallery. I went be just the look of the card and tried to create it myself...
Here's what I used:
B1398 ~ Just for You
Z7147B ~ Stella Paper Packet
Z1360 ~ Rhinestone Designer Brads
Z2114 ~ Cocoa Exclusive Ink
Z2155 ~ Topiary Exclusive Ink
Z2195 ~ Lagoon Exclusive Ink
Z2118 ~ Desert Sand Exclusive Ink
Z697 ~ Sponge
White Gel Pen
On to the card...
I started by cutting the flowered shape on the Cricut using the Art Philosophy Cartridge. This is just one of the many (over 700 shapes) that this useful cartridge cuts out... I then stamped the dotted lines in cocoa onto the shape and picked a pattern and stamped it first in Lagoon and then 'Rock & Rolled' the stamp into Topiary...stamp and repeat, stamp and repeat, stamp and repeat...x6....
I distressed the edges using Desert Sand and a sponge giving the edges a beautiful golden glow as well as the look of an aged piece of paper...leaving it looking stunning!
I used a white gel pen to draw on faux stitching which is a quick and easy way to add simple details without it taking hours of hand stitching. I added the faux stitching to tie in the cocoa stitched pattern on the flower cut out...
I used mt piercing tool and pierced a hole into the center of the cut out and placed a rhinestone brad. Added 3-D foam squares and pooped up the cut out for some added dimension.
Hope you enjoyed this card, there's more where that came from...stay tuned for more!
Let's Live Inspired!
Subscribe to:
Posts (Atom)