Showing posts with label Workshop on The Go. Show all posts

Sunday, June 17, 2012

{It's A Bird...A Plane...A Superhero...}

Who doesn't remember wanting to be Superman or Wonder Woman???

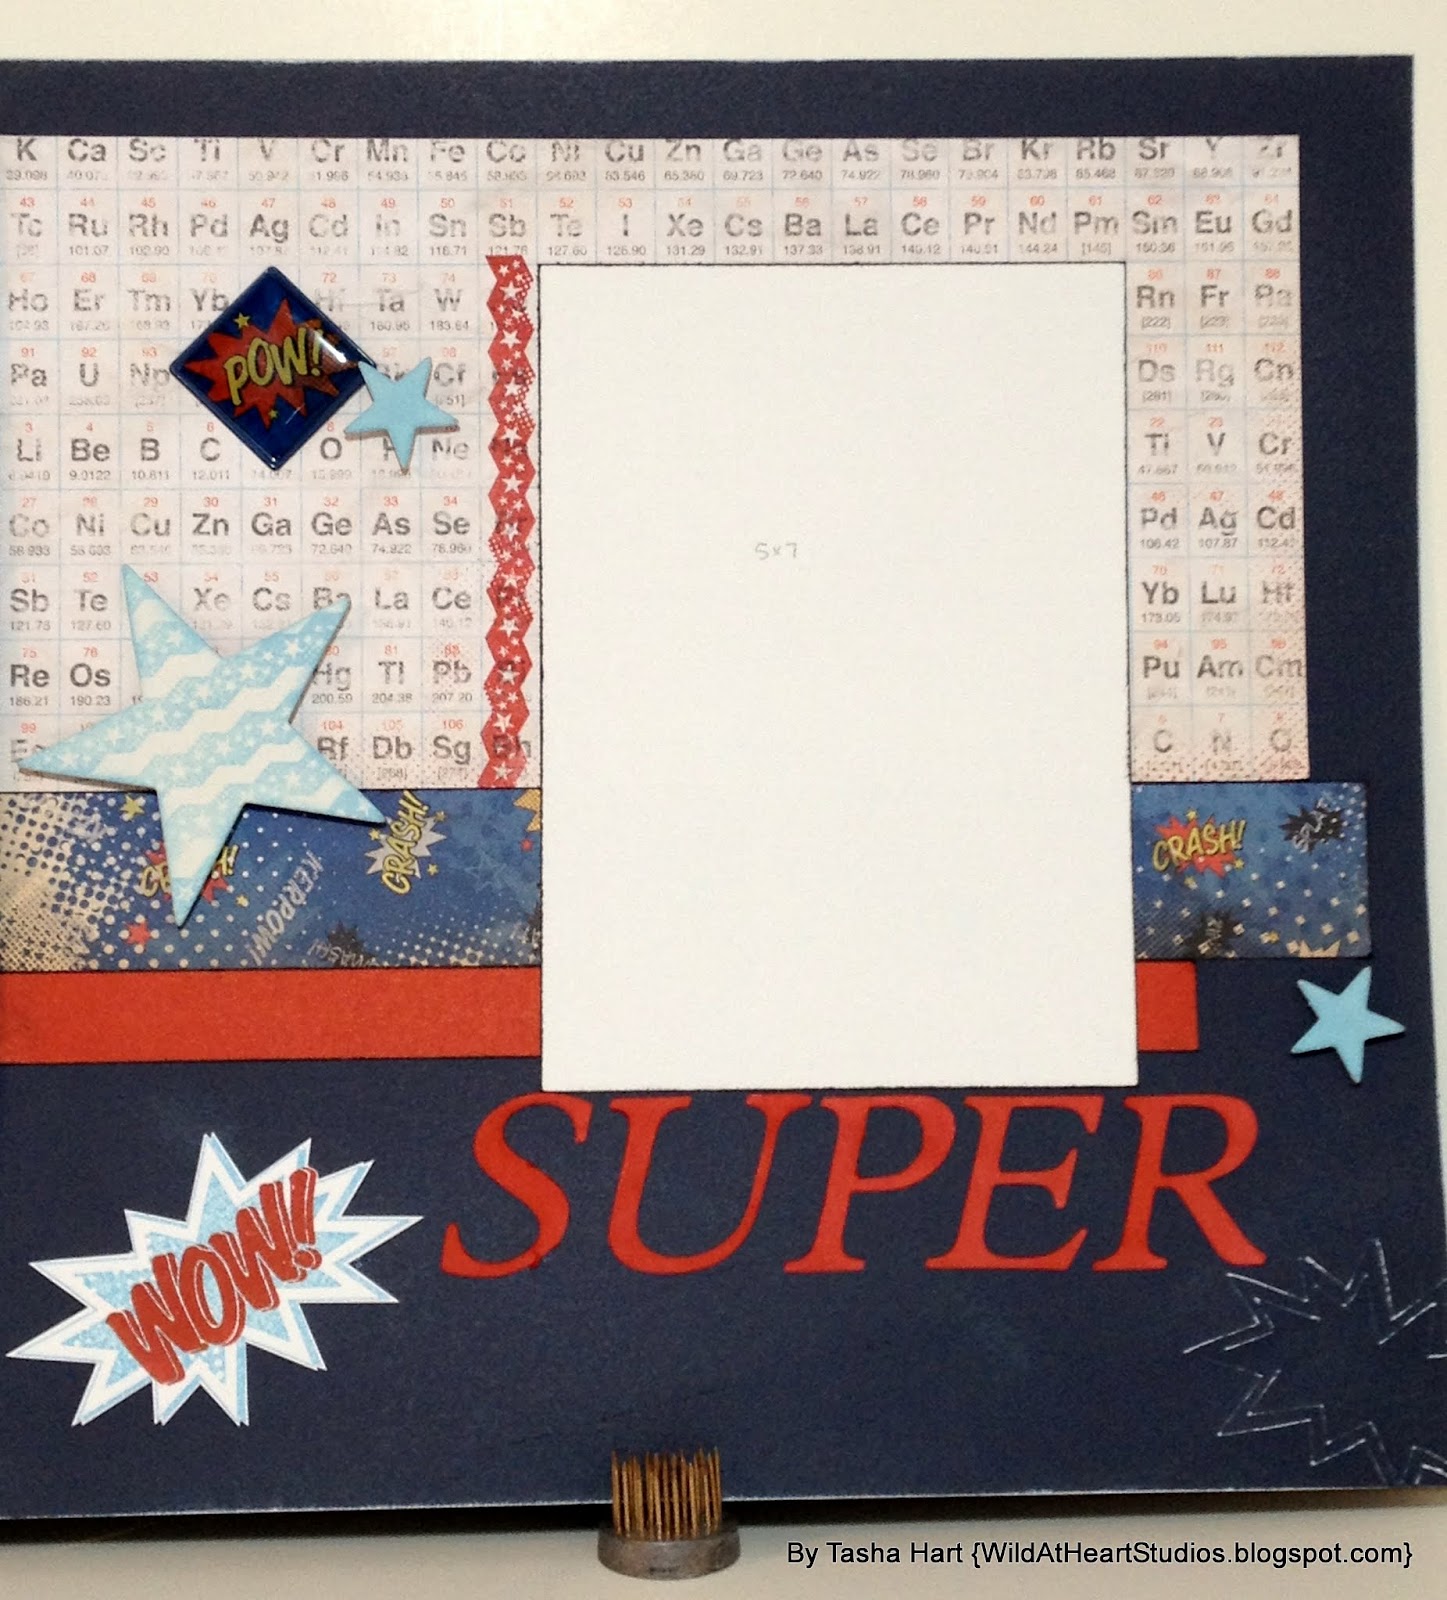
As a child I remember wanting to be the Invisible woman or a princess...well not that either of those has come true, but I found that sense of nostalgia when I saw Close To My Heart's Superhero paper pack...I knew I needed to have it.
 Page 1
Page 2

I decided with no boys in my immediate family that I was not going to be needing a lot of the stamps that coordinate with the theme and I wasn't a huge fan of the new alphabet that coordinates with the theme either...so I decided to just buy the Workshop On The Go kit. (G1037)

The Workshop On The Go kit contains:
  • Superhero Paper Packet
  • My Acrylix® Superhero Workshop Stamp Set (C-size)
  • White Daisy Cardstock Sheets (2)
  • Comic Badge Buttons
  • Dimensional Elements Stars
  • Instructional Guide
  • Featured Colors: Cranberry, Moonstruck, Sky
I looked at all the papers used and decided that I really did not want to use the patterned pages for the base and wanted the layout to stand out because the paper was vibrant and bright...so I used some Outdoor Denim Cardstock (1275)

I kept everything that same as the instructions stated until I got to the part of the title...I didn't want to buy a stamp set that I would not use often so I used my Cricut and cut out my letters for the SUPER title... I sponged them Cranberry Ink (Z2116)


Now I wanted to try a new technique so I stamped the back of my layout base and using my Dry Embossing Stylus (Z608) I pressed out the pattern and created a raised design on the front of my base. Once this was done I used my sanding block and gently sanded over the raised design to expose some of the white core of my cardstock...a favorite feature of the Close To My Heart cardstock...

I continued to sand the edges lightly of the layout and expose some of the core to add a nice distressed edge to the layout.

I hope that this inspired you to want to try this paper out...

Let's Live Inspired!

Wednesday, May 9, 2012

{1 Layout, 5 Ways ~ Layout 2}

So I finally have all my chores done...OK...well I'm still doing them but decided that the little ones are sitting still for more than 5 minutes so I can blog while they are awake...Big accomplishment!

So I started this series of blog posts last week and it is to show the versatility of what one can do with some simple changes such as adding embellishments, changing paper or adding stitching, stamping, embossing and much more...

I wanted to share this Easter layout I did using the same pattern and different paper ~ Lucy!


Now I love the color Pear and I definitely love the Bunny Love stamp set...{I use it often!}
Here is a rundown on the layout...

I cut out my photo mats and the B&T pieces... Cut out 3 scalloped circles with the CTMH Punch and then used one of my mini hole punches and punched holes around the circle to give it a lacy look... Using the CTMH Watercolor Pencils I colored the bunnies and let them dry, I then applied glue and some white glitter to the bunnies...I random stamped some little flowers onto the Base to add some detail to the page without it being distracting... I printed out the word 'Easter' and using the Piercing tool poked holes to form a pattern and hand stitched the word to form my title... lastly, I took a piece of Sweet Leaf Ribbon and tied a knot and adhered it to the layout...

 Some simple watercolor pencil coloring and a glittered bunny makes this one cute bunny!
 This bunny is grey and not to be disturbed...
Who doesn't like to blow bubbles? This bunny has Liquid Glassed bubbles to add a raised texture and glossy look to each bubble...one of the great things you can do with Liquid Glass!

Now I used banners on the last layout and wanted to switch it up...
Using Ribbon as an accessory is a great way to add texture and detail to a layout or card. I usually use a strip of ribbon alone or with a bow but rarely use a knot... I definitely will be using this look more often {and it is easier and faster too!}

I LOVE Scriptina font! I decided that some of our CTMH stamps feature this font in some of our stamp sets...For Every Occasion is an example. I decided that for the title I wanted a challenge...I do not sew! Especially with a sewing machine...far to scary for me...lol! With this all in mind I practiced first to ensure you would be able to make out the word and once I was confident you would be able to read this layout, I was in business! In a sewing fury I was finished with a couple poked fingers and 1/2 hour later...Voila! I had a title!

I hope that you enjoyed this and will come back soon to see the next post in this series of posts!


Let's Live Inspired!


Monday, April 30, 2012

{1 Layout, 5 Ways ~ Layout 1}

I don't know what crazy notion came over me to decide that I would sit and blog these layouts all in one week... It could be boring... It could be inspirational... It could be a challenge to others to try to recreate this layout in their own way... Either way it is now time to blog the first layout of this series...


Now I love this layout and had seen one on Pinterest... I love the versatility and the clean look that allows the stamps and paper to really stand out on this layout. I said I would give a quick tutorial of some of the great techniques that each of these pages features...

Technique 1: Stitching

I used the Close To My Heart Ruler and started by picking a pattern that I wanted to use on this layout. I love that the ruler allows for a variety of stitches without having to buy a sewing machine...oh how they scare me... So once I picked my pattern (Simple X's) I took my piercing tool set and started to poke my holes into the cardstock...

Once the holes are in I took my embroidery thread and unraveled the strands. I wanted to have a thin tread look so using one strand was what I used to sew it. I started to stitch the pattern and continued on until the pattern was finished on both the top and the bottom of my page.

Sewing was now complete!


So once my stitching was finished I stamped my patterns and grabbed my Versamark, Silver Pearl Embossing Powder (now retired) and heat tool. Embossing is the next technique!

Technique 2: Heat Embossing

You take a stamp and can either stamp the stamp with ink first and Versamark after to allow for the option of seeing the ink (when using Clear or Clear Detail powder) I decided that I wanted to be able to see a hint of color with the silver pearl so I stamped with Desert Sand first and then used my Versamark pad and stamped over it. I then sprinkled my Silver Pearl embossing powder over the Versamark and covered it. I then shook off all the excess powder to reveal just the stamped image covered in the powder...
Enter the heat tool... I aimed the heat tool towards the powdered image and hold it about 6 inches or so away from the image. I heat the image until it begins to melt moving the heat tool around until the whole image is melted. On some of the images on this page I allowed the image to melt but wanted to keep a textured look so as it melted I stopped before it melted to a smooth finish...
Once you have the image the way you like you are finished! Do not touch the heat tool end as it is very hot!

Thorough out this layout you see these beautiful yellow flowers... These flowers are cut out on the Cricut using my Art Philosophy Cartridge. They are cut out in two different sizes and then stamped with the stamp that comes with the Pemberley Workshop On The Go kit. Once it is dried I bent the petals and adhered them together with a glue dot. I placed a pearl gem onto the center and feel that this helps accentuate the silver pearl embossing.

Well until tomorrow, I hope you enjoy this layout! Tomorrow is Layout 2...


Let's Live Inspired!


Saturday, April 28, 2012

{Heart 2 Heart Photo Inspiration Challenge}

Today has been a treat for my blog...a record posts in one day! I have also entered 3 projects for 3 challenges in one day...another record for me! All of this with little ones running, and regular life underway...

Now I saw this photo challenge on the Heart 2 Heart Challenge and realized that I could do this...

Now I didn't think about the complete picture and figured I would use my new Simple Memories stamp set and do a doily pattern...wrong...

Once I had used it I realized it was not doing it for me so I went to the Pemberley Workshop on The Go stamp set and used a stamp from there...It was perfect! (Although I realized later that I was not the first to think this way either...)

I then had to figure out what colors to use and decided on Creme Brulee and Blush. I also used Sweet Leaf 1" ribbon, some white grosgrain and the pretty pins from the Bling Assortment. Playing off the pearl on the pretty pin, I decided to place Pearl Opaques into the centers of each flower and one Bitty Pearl on the stamped sentiment 'Congratulations' from For Every Occasion Stamp Set.

I am trying to make sure that when I do a card I consider all aspects of the card...Including the inside...so I placed a Sweet Leaf ribbon pendent and stamped a few flowers into the inside...I tried to add some texture to the flowers by rubbing them onto the ink pad and by not huffing on one of the stamps to let the ink appear textured...

Here is the card...


 Hope you enjoyed this brief post.


Let's Live Inspired!

Thursday, April 12, 2012

{Pretty Pemberley ~ Part Two}

Well I wanted to add another layout to this great paper pack...I have some more surprises to come including a blog hop...Good things are happening...

So I was leery of  Pemberley Paper as I really didn't see it as a great scrapbooking paper...I has large patterned pages that I envisioned on cards...Which I have not created...lol! But I pushed the preconceived idea that this paper was not going to be my favorite or a good scrapbooking paper for me. I ended up using it more than the other paper packs so far and I must say that I love this paper pack!

I bought the Workshop On The Go kit which contains the following...
  • Pemberley Paper Packet
  • My Acrylix® Pemberley Workshop Stamp Set (C-size)
  • Colonial White Cardstock Sheets (2)
  • Bouquet Assortment
  • Bitty Opaques Pearl Adhesive Gems
  • Instructional Guide
  • Featured Colors: Honey, Outdoor Denim, Indian Corn Blue, Bamboo
 I had fun with this kit in the end and using my Cricut Art Philosophy Cartridge again... to create some new projects that pushes me to try new things...Popular concept as of late...

So here is what I came up with this time...


This is the two pages complete


I used the Cricut AP Cartridge to create this fabulous envelope
with Velcro dot closure
Beautiful pendant banner with bitty pearls


Bold patterns balance this page

Another beautiful project {flower} made with AP Cartridge


I hope that you enjoyed this and if you were not already a fan of Pemberley that maybe I have changed your mind or am beginning to...

Let's Live Inspired!

Wednesday, April 11, 2012

{Pretty Pemberley}

I know I haven't posted allot of scrapbooking layouts but I have found that I really do love to scrapbook. I have been spending quite a bit of time working on the layouts that I have finished and would love to spend some time sharing them with you all.

I have been busy trying to catch up on my blogging and creating a couple Easter projects that I have not been scrapping for a couple of weeks...OK that and the fact that I can not see almost every surface in my craft room...Time to spring clean...

I have fallen in love with all the fabulous paper packs that Close To My Heart has released in the Spring/ Summer 2012 Idea Book...My first paper pack to share with you all is Pemberley.
I didn't feel that this was going to be a favorite of mine at first and really only pictured cards being created with this one...well, was I ever wrong!


I loved the details on this layout. It is a clean and delicate layout. I loved the fabulous handmade flowers on the layout. It was awesome using the Art Philosophy Cricut Cartridge to create these flowers and add some skill to this layout.

I also loved the idea that a person can add multiple pictures to this layout without it being overwhelmed or that the pictures dominated the layouts rather than the layout as a whole.

Page 1
Page 2

I hope that you are inspired to go out and create some pretty Pemberley Layouts too!
Come back tomorrow for another Pretty Pemberley Layout!


Let's Live Inspired!

Monday, February 27, 2012

{Lovely Lucy ~ Part Two}

After finishing my February Sketchy Challenge, I decided to continue working on my layouts for my upcoming trade show.

I simply love the Lucy Level 2 paper and Glittery Rub-ons that co-ordinate with the paper. So I decided to do the extra layout that is listed on the CTMH website.

So without a whole lot of explanation, this layout was one that is featured in the Magic How To book that will soon be retiring. If you have not bought any of the How to books from Close To My Heart they are amazing and are only available through the duration of the Current Idea Book. Spring/Summer 2012 (Available until July 31, 2012)

Here are the pages... Enjoy!

Lucy Layout 2 ~ Page1

Lucy Layout 2 ~ Page 2

Thanks for stopping by...Come back tomorrow for a peek of some more of my Crafty Creations!

Let's Live Inspired!

Saturday, February 25, 2012

{Lovely Lucy}

Throughout the last two weeks many days were spent sick and unable to do much so while I had enough energy I decided to play around with the Lucy Workshop On The Go kit. I really loved the colors and the beautiful C-sized stamp set that came with this workshop kit.

I set out to really try to work diligently...definitely not organized...lol!

I loved that the workshops are made so easy to understand and follow. It was also awesome to have the Cricut do most of the detailed and otherwise time consuming cutting that this layout would have involved...HUGE bonus if you ask me!

So without further ado...

Lucy Workshop Page 1
All of the butterflies and flowers and banner pieces were cut out using the Cricut. It was super easy to stamp the images on and make them look fabulous. I added a little understated bitty jewels to the flowers and to the glitter rub-on images of crowns....perfect for the little princess in your life...

Lucy Workshop Page 2
For this page The beautiful green scalloped edge, flowers, butterflies and title were all cut out with the Cricut. If you weren't convinced scrap booking could be so easy...let me show you how...

Well I hope that you like this lovely two page layout and I hope to add some inspiration!
Let's Live Inspired!