Monday, April 30, 2012

{1 Layout, 5 Ways ~ Layout 1}

I don't know what crazy notion came over me to decide that I would sit and blog these layouts all in one week... It could be boring... It could be inspirational... It could be a challenge to others to try to recreate this layout in their own way... Either way it is now time to blog the first layout of this series...


Now I love this layout and had seen one on Pinterest... I love the versatility and the clean look that allows the stamps and paper to really stand out on this layout. I said I would give a quick tutorial of some of the great techniques that each of these pages features...

Technique 1: Stitching

I used the Close To My Heart Ruler and started by picking a pattern that I wanted to use on this layout. I love that the ruler allows for a variety of stitches without having to buy a sewing machine...oh how they scare me... So once I picked my pattern (Simple X's) I took my piercing tool set and started to poke my holes into the cardstock...

Once the holes are in I took my embroidery thread and unraveled the strands. I wanted to have a thin tread look so using one strand was what I used to sew it. I started to stitch the pattern and continued on until the pattern was finished on both the top and the bottom of my page.

Sewing was now complete!


So once my stitching was finished I stamped my patterns and grabbed my Versamark, Silver Pearl Embossing Powder (now retired) and heat tool. Embossing is the next technique!

Technique 2: Heat Embossing

You take a stamp and can either stamp the stamp with ink first and Versamark after to allow for the option of seeing the ink (when using Clear or Clear Detail powder) I decided that I wanted to be able to see a hint of color with the silver pearl so I stamped with Desert Sand first and then used my Versamark pad and stamped over it. I then sprinkled my Silver Pearl embossing powder over the Versamark and covered it. I then shook off all the excess powder to reveal just the stamped image covered in the powder...
Enter the heat tool... I aimed the heat tool towards the powdered image and hold it about 6 inches or so away from the image. I heat the image until it begins to melt moving the heat tool around until the whole image is melted. On some of the images on this page I allowed the image to melt but wanted to keep a textured look so as it melted I stopped before it melted to a smooth finish...
Once you have the image the way you like you are finished! Do not touch the heat tool end as it is very hot!

Thorough out this layout you see these beautiful yellow flowers... These flowers are cut out on the Cricut using my Art Philosophy Cartridge. They are cut out in two different sizes and then stamped with the stamp that comes with the Pemberley Workshop On The Go kit. Once it is dried I bent the petals and adhered them together with a glue dot. I placed a pearl gem onto the center and feel that this helps accentuate the silver pearl embossing.

Well until tomorrow, I hope you enjoy this layout! Tomorrow is Layout 2...


Let's Live Inspired!



Saturday, April 28, 2012

{Heart 2 Heart Photo Inspiration Challenge}

Today has been a treat for my blog...a record posts in one day! I have also entered 3 projects for 3 challenges in one day...another record for me! All of this with little ones running, and regular life underway...

Now I saw this photo challenge on the Heart 2 Heart Challenge and realized that I could do this...

Now I didn't think about the complete picture and figured I would use my new Simple Memories stamp set and do a doily pattern...wrong...

Once I had used it I realized it was not doing it for me so I went to the Pemberley Workshop on The Go stamp set and used a stamp from there...It was perfect! (Although I realized later that I was not the first to think this way either...)

I then had to figure out what colors to use and decided on Creme Brulee and Blush. I also used Sweet Leaf 1" ribbon, some white grosgrain and the pretty pins from the Bling Assortment. Playing off the pearl on the pretty pin, I decided to place Pearl Opaques into the centers of each flower and one Bitty Pearl on the stamped sentiment 'Congratulations' from For Every Occasion Stamp Set.

I am trying to make sure that when I do a card I consider all aspects of the card...Including the inside...so I placed a Sweet Leaf ribbon pendent and stamped a few flowers into the inside...I tried to add some texture to the flowers by rubbing them onto the ink pad and by not huffing on one of the stamps to let the ink appear textured...

Here is the card...


 Hope you enjoyed this brief post.


Let's Live Inspired!

{Baby Mini Album}

Well I have had this little gem just sitting and waiting for the perfect time to share it. I went through a quick phase where I thought I loved to create mini albums and had a very particular view on what they should look like...

...Now I have come to realize that mini album come in all shapes, sizes and styles...

I am submitting this album for the Two-Hour Challenge: Scrapbook Baby Pictures in a Quick-and-Easy Mini Album over at the Club CK Blog.

So without further ado...

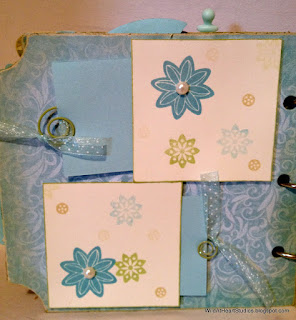
 Front Cover. Space provided to add a name or a picture.
 3 tags ~ One for journaling and two provided for pictures. All are removable.
 One pocket with a tag for journaling and two for pictures.
 Page provided for a picture or for placement of baby hand prints/ foot prints
 Vellum pocket with a tag, ideal for hair tendril from first hair cut and space for picture or journaling
 Place for 3 - 5 pictures with pull out flap
 Journaling spot and place for pictures or birth information in circle embellishment (Rotates)
 Two tags with space for journaling or hand prints/ foot prints. Tags fold out to large pages.
 Stork embellishment holds a bag for arm and leg bands

Love you forever...perfect for a sleeping baby picture
CD/DVD pocket perfect for holding pictures or video of first birthday, birth or maybe the complete first year!


Instead of giving you the step by step of this album I will leave it with the basics and little details. If you are interested in how this album was made and more specific details feel free to contact me.


Let's Live Inspired!

{Heart 2 Heart Stitching Challenge}


Well I haven't been participating in many challenges and I feel that the time has come to step out and create! I want to be challenged and I want to get some feedback from other like minded people. I love to check out all the great submissions but I have not participated due to excuses...lol!

Well now I am setting the excuses aside and I'm participating! This layout is my submission for the Heart 2 Heart Stitching Challenge.

So I have been doing a lot of stitching lately due to Close To My Heart coming out with their amazing ruler! I love that ruler and although people point out how quick and easy a sewing machine would be, I like the look I get with the ruler and embroidery thread...and frankly, the sewing machine kinda scares me...lol!

So I have a layout that I did some hand stitching on and I love it!

This layout features the Pemberley paper, Card Word Puzzle Stamp Set, Cork Letters, Liquid Glass, Bitty Pearls, White Daisy Embroidery Thread and some random butterflies from the Just Blooms Flutter Paper Shapes.

I truly love how this layout has come out and feel that it is fabulous and versatile as well.

I hope that you have enjoyed your visit and that you will come back again soon!

Let's Live Inspired!


Thursday, April 26, 2012

{One Layout, Five Ways!}

Well with dance ending this weekend I now feel like there is more time to create! Yay! I have been busy creating with Dotty For You paper...which means more posts...

Starting Monday I will be posting a series of one page layouts that are the same layout done using different paper or techniques to show you how you can take one layout design and use it in the same album to keep some consistency but not have it look like a total duplicate.

Now I had lots of fun designing these pages and hope that you will too! I will be using such tools as the ruler and embroidery thread from Close To My Heart, the Cricut Art Philosophy Cartridge, embossing powder and craft heater...

To give you a teaser I will post a quick picture of the first layout...
Tune in Monday...


Let's Live Inspired!

Wednesday, April 25, 2012

{Dotty For You Constant Campaign}

Well I was always told that patience is a virtue...but...when you are waiting for your Close To My Heart order to arrive, if you are like me...it is not an easy task...

I was so sad when Easter had arrived and my order had not arrived as this only meant that I was going to be waiting another 5 days...how was I going to survive...

Well... incase you hadn't realized, I did survive and managed to find a few other projects to keep myself busy while I waited...

So without further ado...

Here are my first projects I have created with this awesome paper pack.


Love this paper? So do I! There are three ways you can get this paper pack from Close To My Heart
  1. Between April 17th and May 31st place a $35 order with me or on my website and add this paper pack for only $5!
  2. Host a gathering (at your home or on-line) of $400 or more between April 17th and May 31st and get this paper pack for FREE!
  3. Join the club :) Become part of my fabulous team and get all the benefits of club membership plus the opportunity to grow a business starting now and until May 31st and get this paper pack for FREE! You can find more information about joining the club here or sign up here

Check out this video for some great samples using this fabulous paper pack!

Let's Live Inspired!

Friday, April 13, 2012

{Dotty For You}

Be prepared to have fun with the new constant campaign starting April 17...

Dotty For You!

Snatch a Dotty for You paper packet at an incredible discount or even FREE!


Celebrate National Scrapbooking Month in May by mixing and matching to your heart’s content with our new Dotty for You paper packet! The trendy patterns on the front of the papers coordinate perfectly with the dots on the reverse side, giving you lots of options for crafting colorful layouts, cards, and other projects. Dotty for You includes 24 specially designed, coordinating B&T Duos® sheets (2 each of 12 patterns) and an artwork idea insert to get your creative juices flowing.
There are three ways to get this exclusive Dotty for You paper packet, valued at $19.95:
  • Place an order of $35 or more in products from the Spring/Summer 2012 Idea Book between April 17 and May 31, and add the Dotty for You paper packet for just $5*.
  • Host a Gathering with a sales total of $400 or more (excluding tax, shipping/handling, and Operation Smile® donations) between April 17 and May 31 and receive a Dotty for You paper packet FREE.
  • Join Close To My Heart as a new Consultant between April 1 and May 31 and receive a Dotty for You paper packet FREE.
Celebrate National Scrapbooking Month in May with the oh-so-cute Dotty for You paper packet. Talk to ME today!

*Taxes and shipping/handling may apply. Offer good during above-specified dates, while supplies last.
Let's Live Inspired!

Thursday, April 12, 2012

{Pretty Pemberley ~ Part Two}

Well I wanted to add another layout to this great paper pack...I have some more surprises to come including a blog hop...Good things are happening...

So I was leery of  Pemberley Paper as I really didn't see it as a great scrapbooking paper...I has large patterned pages that I envisioned on cards...Which I have not created...lol! But I pushed the preconceived idea that this paper was not going to be my favorite or a good scrapbooking paper for me. I ended up using it more than the other paper packs so far and I must say that I love this paper pack!

I bought the Workshop On The Go kit which contains the following...
  • Pemberley Paper Packet
  • My Acrylix® Pemberley Workshop Stamp Set (C-size)
  • Colonial White Cardstock Sheets (2)
  • Bouquet Assortment
  • Bitty Opaques Pearl Adhesive Gems
  • Instructional Guide
  • Featured Colors: Honey, Outdoor Denim, Indian Corn Blue, Bamboo
 I had fun with this kit in the end and using my Cricut Art Philosophy Cartridge again... to create some new projects that pushes me to try new things...Popular concept as of late...

So here is what I came up with this time...


This is the two pages complete


I used the Cricut AP Cartridge to create this fabulous envelope
with Velcro dot closure
Beautiful pendant banner with bitty pearls


Bold patterns balance this page

Another beautiful project {flower} made with AP Cartridge


I hope that you enjoyed this and if you were not already a fan of Pemberley that maybe I have changed your mind or am beginning to...

Let's Live Inspired!

Wednesday, April 11, 2012

{Pretty Pemberley}

I know I haven't posted allot of scrapbooking layouts but I have found that I really do love to scrapbook. I have been spending quite a bit of time working on the layouts that I have finished and would love to spend some time sharing them with you all.

I have been busy trying to catch up on my blogging and creating a couple Easter projects that I have not been scrapping for a couple of weeks...OK that and the fact that I can not see almost every surface in my craft room...Time to spring clean...

I have fallen in love with all the fabulous paper packs that Close To My Heart has released in the Spring/ Summer 2012 Idea Book...My first paper pack to share with you all is Pemberley.
I didn't feel that this was going to be a favorite of mine at first and really only pictured cards being created with this one...well, was I ever wrong!


I loved the details on this layout. It is a clean and delicate layout. I loved the fabulous handmade flowers on the layout. It was awesome using the Art Philosophy Cricut Cartridge to create these flowers and add some skill to this layout.

I also loved the idea that a person can add multiple pictures to this layout without it being overwhelmed or that the pictures dominated the layouts rather than the layout as a whole.

Page 1
Page 2

I hope that you are inspired to go out and create some pretty Pemberley Layouts too!
Come back tomorrow for another Pretty Pemberley Layout!


Let's Live Inspired!